Sketchup to Photoshop: No Render Engine Required
正如标题所说,这个建筑渲染教程没有使用渲染引擎。以前我做过其他一些不涉及渲染程序的教程,但是本教程做的事情有点不同,不仅可以在更短的时间内完成,而且和我的“环境光遮蔽教程”中有一些相似之处。我之后通过“环境光遮蔽教程”意识到,我可以利用SketchUp 导出选项,并使用线的调整的模型产生阴影。正因为如此,该过程是非常精简,可以在几分钟内完成。
As the title implies, this architecture illustration tutorial doesn’t use a rendering engine. I have done a few other tutorials in the past that don’t involve a rendering program, however this tutorial does things a little differently, and in less time. You will probably notice some similarities to the Ambient Occlusion tutorial I posted a while back. I realized after making the ambient occlusion tutorial that I could take advantage of the export options of Sketchup, and use the line work of the model to generate the shading. Because of this, the process is extremely streamlined and can be done in minutes.
过程如下:
1. 在 SketchUp 里,保存一个你想要作为渲染图的场景,如果需要的话,你可以得到相同的场景。
2. 将正面样式设置为“消隐线框显示”,在视图>边线样式里,选择“显示边线”,确认阴影是关闭的。
Here’s how it works,
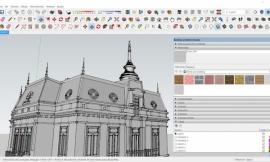
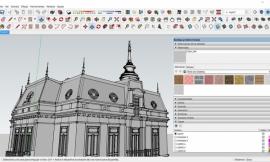
1. In Sketchup, save a view/scene that you want to use for the illustration that way you can get back to the same view later if need be.
2. Switch the Face Style to “HIDDEN LINE”. Under VIEW>EDGE STYLE, check “DISPLAY EDGES.” Make sure shadows are off.
3. 打开文件>导出>2D 图像,保存为一张 JPEG 格式的图片。
4. 保持正面样式为“消隐线框显示”,打开阴影,然后再保存一张 JPEG 格式的图片。
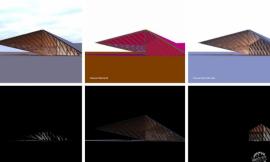
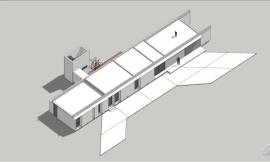
3. Go to FILE>EXPORT>2D GRAPHIC and save the image as a JPEG.
4. With the Face Style still set to “HIDDEN LINE”, turn ON shadows and again export the image as a JPEG.
5. 现在,将正面样式从“消隐线框显示”改成“阴影纹理”,然后再导出一张 JPEG 格式的图片。
5. Now, switch the face style from “Hidden Line” to “Shaded with Texture.” Again, export the image as a JPEG.
6. 把已经完成的三张图片在一个 Photoshop 文件里打开,首先在 Photoshop 里打开第一张图片(SketchUp 导出的只显示边线,没有阴影),右键点击背景图层(点击图层名称旁边的空间),并选择“复制图层”。
6. With the 3 images complete, it’s time to combine them in Photoshop. Begin by opening the first image (Sketchup export with only line work, no shadows) in Photoshop. Right click on the background layer (Click in the space next to name of the layer) and choose “Duplicate Layer”.
7. 在顶部,选择“滤镜>模糊>高斯模糊”。
7. At the top, select “FILTER>BLUR>GAUSSIAN BLUR”.
8. 当对话框出现,选择一个约6.5的半径,这个数字可能取决于你的图像分辨率的不同而变化。
8. When the dialogue box appears, choose a radius of about 6.5. This number may need to change depending on the resolution of your image.
9. 随着线条模糊,我们需要变暗它们,我更喜欢用色阶,虽然你也可以通过调整对比度,对于色阶,打开图像>调整>色阶,移动左边的黑色三角滑块向右移动直到线的暗的部分接近黑色。
9. With the lines now blurred, we need to darken them. I prefer to use levels although you can probably get away with adjusting the contrast. For levels, go to “IMAGE>ADJUSTMENTS>LEVELS”. Move the left black triangular slider to the right until the line work darkens to almost black.
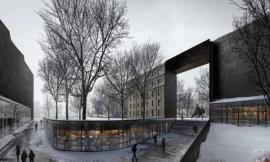
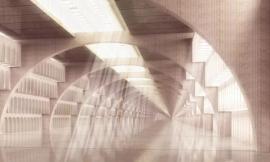
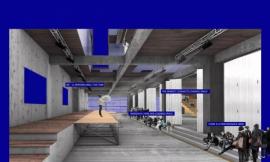
下图是这个阶段应该看起来的样子。
Below, is what the image should look like at this stage:
10. 下一步,复制你刚才创建的图层并将它移至顶部,这个复制的图层将再次使用高斯模糊,然而,这次使用更大的半径,例如 35。
10. Next, duplicate the layer just created and move the new layer to the top. This duplicated layer will be blurred again using the Gaussian Blur Filter. However, use a higher radius such as 35 this time.
11. 我想让原始的线的图层能透过这两个刚刚创建的模糊的图层,要做到这一点,选择这两个模糊的图层,设置图层混合模式为“正片叠底”。
11. I want the original line work layer to show through the two, now blurred, layers just created. To do this, select the two blurred layers and set the layer blend mode to “Multiply”.
12. 接下来是“秘方”教程步骤,打开SketchUp 导出的图像,显示出线条和阴影,把这个新的图层拖到顶部,把这个图层混合模式改变为“强光”模式。
12. The next step is sort of the “secret sauce” of the tutorial. Open the Sketchup exported image that showed both the line work and shadows. Drag the new layer to the top layer. Set the Layer Blend mode to “Hard Light”.
13. 为了给图片加上一些色彩,打开SketchUp 导出的正面样式为”阴影纹理“的图片,把这个图层拖到最下面,仅仅在“背景”图层的上面。
13. To add some color to the image, open the Sketchup exported image that had the face style “Shaded with Textures” turned ON. Drag the new layer to the bottom, just above the “Background” layer.
14. 我喜欢把我的渲染图添加一些颜色叠加,创建一种愉悦的基调,创建一个新的图层并将它移到顶端,选择画笔工具,将硬度设置为 0,以及较低的不透明度,设置为 25%~30%,开始画在你想让颜色更多的地方。
14. I like to add color overlays to my illustrations to give them more of a mood. Create a new layer and move it to the top layer. Select the “Brush Tool”, and adjust its settings to have 0 Hardness as well as lower the opacity down to 25 to 30%. Begin painting in color in areas you want more color.
15. 设置图层的混合模式为“叠加模式”。
15. Set the Layer Blend mode to “Overlay”.
16. 最后一件事,我想让阴影可以变得更暗一点,为此,我在第12 步操作里选择“消隐线框显示“,打开阴影的图片并被设置为”强光“模式的图层,复制它,现在,选择新复制的图层,然后把它的混合模式从强光改为正片叠底,如果阴影感太强,你可以调整图层的不透明度来削弱它。
16. One last thing, I want the shadows to be a little more darker. To do this, select the layer with lines and shadows that was set to “Hard Light” in Step 12, and “Duplicate” it. Now, select the new duplicated layer and change the Layer Blend mode from “Hard Light” to “Multiply”. You can adjust the layer opacity if the shadows are too strong.
这就是全部,看起来有很多的步骤,但我认为一旦尝试几次,你会意识到这是相对简单的,可以在短短的几分钟内创建整个渲染图。
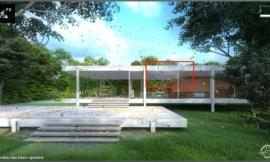
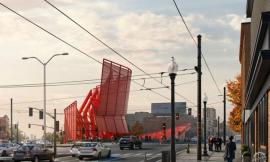
在最后结束之前,我还加了一些周边暗角(请点击这里的教程,我也叠加了另一个 SketchUp 导出的图片,正面样式为 X 射线,为了在亮部的区域增加一些细节。
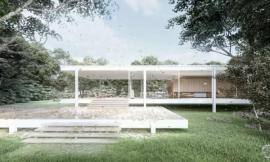
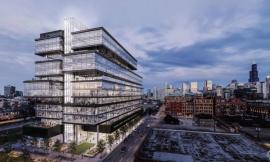
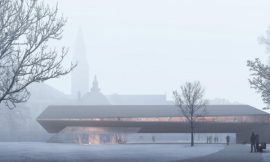
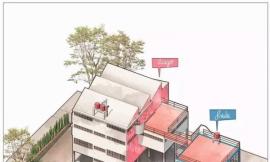
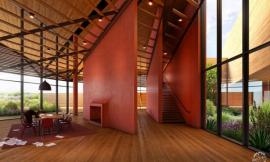
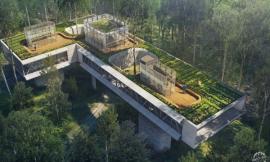
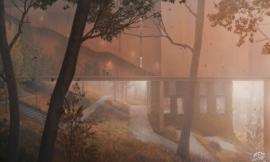
That’s it! It may seem like a lot of steps, but I think once you go through them a few times, you will realize they are relatively simple and the whole illustration can be created in a matter of minutes.
For the final shot below, I added some vignetting (tutorial HERE). I also overlayed another exported Sketchup image with the face style set to “Xray” mode for a more detail in the light areas of the illustration.
出处:本文译自visualizingarchitecture.com/,转载请注明出处。
|
|