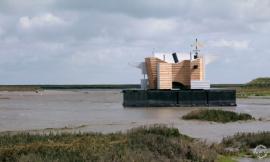
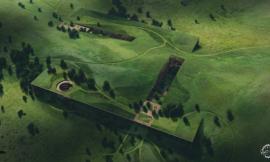
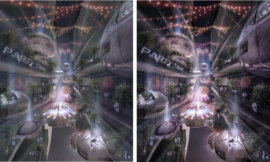
In part one, I discussed some quick study vignettes of the cliff retreat design. For part two, I want to go into more depth about how I used a Material ID render channel to speed up my material selections and generate these illustrations in a relatively short amount of time. This not only streamlines my Photoshop workflow, but also allows me to make quick updates to my Photoshop files later if my design changes. By utilizing Material ID channels and masked groups, I can simply render out a new ID every time I make a change to my design, update the ID layer in my Photoshop file, and then use that new ID to update my masks as needed. Below is a quick explanation of how I do that.
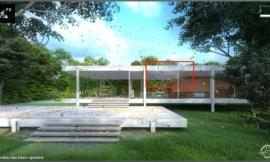
In this tutorial, I am using V-Ray for Sketchup which automatically generates colors for each texture used in the model. Above is the what the Material ID channel looked like for my view. Most rendering programs like V-Ray offer the ability to create a Material ID channel.
To turn on the Material ID channel, open the V-Ray Option Editor dialogue box, and go to the “VFB Channels” tab. In that tab, find “Material ID” in the Standard Channels list and select it. Now that it is selected, V-Ray will generate this channel when you render the image.
After rendering the view, you can find the Material ID channel in the upper left side of the frame buffer window in the drop down menu. You can save the image from the frame buffer window but I typically have V-Ray save all of my channels automatically by checking the “Save Output” box in the “Output” tab of the V-Ray Option Editor.
3. BRING IN MATERIAL ID CHANNEL INTO PHOTOSHOP/把材质ID通道导入PS
我喜欢把材质ID图层放在图层面板最上层。这样我可以随时简单地把它关闭而不受到其它图层的影响。
I like to keep my Material ID layer at the top of the layers palette. This allows me to turn it off and on easily to make selections without any other layers getting in the way.
4. MAKE SELECTION/创建选区
要建立材质ID选区的话,把材质ID图层打开,然后点击菜单栏中的“选择>色彩范围”。
To make a selection, select and turn on the Material ID Layer. Then, Choose “Select>Color Range”.
When the Color Range dialogue box appears, set the “Fuzziness” slider to somewhere around 50. This may need to be adjusted depending on the color and amount of detail that is being selected. Next, pick the color that you want selected and then choose “OK”.
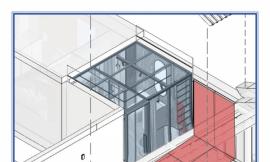
I could end this tutorial here since we have completed the task of using the Material ID to make a selection, but I want take it one step further and turn that selection into a mask on a group. This allows me to use one mask for many textures instead of applying the same mask to each individual layer. First, create a new group by clicking the “Create a New Group” icon at the bottom of the layers palette. With the selection from the material ID still active, select the “Create New Mask” icon at the bottom of the layers palette. This will apply a mask to the group just created.
I now can drag my grass textures into that group just created and not have to worry about masking each individual grass texture. This is especially useful if I make changes to the railing or wall, I don’t need to update all of the individual grass texture masks. Instead, I only need to update the group mask and all of my grass textures inside will be updated too.
By rendering out the Material ID with each new rendering, I can make selection fast and accurately. By applying masks to groups instead of each individual layer, I maintain a clean and organized Photoshop file with minimal masks. This workflow allows me to easily update my Photoshop files as I continue to design and refine my project.