I’m pretty excited about this video. It explores the idea of Ambient Occlusion shading to easily and quickly add realism to Sketchup images via Photoshop. This is done without ever using a rendering engine such as MAX or VRAY. The idea behind Ambient Occlusion is basically a really fast way of adding realism to a rendering by adding shadows in corners where geometry meets. You will often see me adding this affect in a lot of the videos I created using the BURN tool in Photoshop. This video demonstrates how easy it is to get a really cool effect using just images exported from Sketchup, and a few tools from Photoshop.
If any of you have watched my Kerkythea clay model tutorial, you will notice that you get a similar look. The rendering engine is doing all of the work for you. The idea behind this new video is to show the power of the BURN tool in Photoshop, and how it can be applied to architectural illustrations. If there isn’t a lot of complex geometry in the image (in my case an aerial view of my design) than this method serves as an option to bypass using a rendering engine such as Kerkythea altogether and still get a really nice looking final result. Also, if your final illustration is looking a little flat, its an easy way to add a little punch to it.
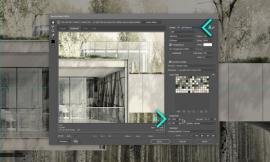
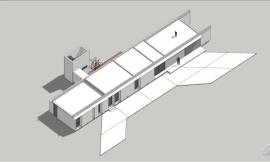
从SketchUp中 导出隐藏线/Exported Linework from Sketchup
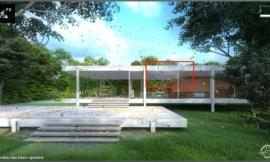
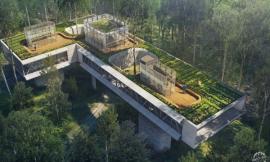
导出开启阴影,没有边线的SketchUp 图片/Exported SU image with shadows turned on, line work turned off
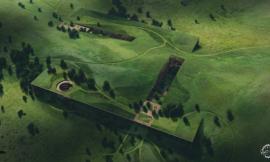
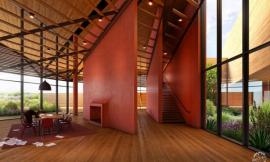
在用了加深工具和高斯模糊之后的最终的图片/Final Image after using the Burn tool and Gaussian Blur filter in Photoshop
A couple of notes:
I may have overdone it a little with the blurring of the shadows haha. The main idea to take away from this part is to avoid having really sharp shadow edges. The shadows cast by a building will usually have a little falloff, adding more falloff as the shadow moves further away from the building
You will notice that in the beginning, I export an image with no lines, shadows turned on, and in shaded mode. I then take it into Photoshop and tweak it so that I am left with just shadows. Sketchup 7 will not let me export just shadows in hidden line mode. So this is a little work around I came up with. If you have any better ideas on how to export just shadows, feel free to post them.