Architectural GIFs
由专筑网缕夕,刘庆新编译
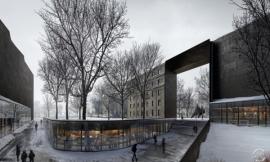
对于教学历史悠久的学校来说,GIF还是一个不上台面的教学,然而却可以很好的传达建筑方案理念。我正纠结着怎么更好的表达我的研究实验室设计中可操作的阴影系统。然而GIF明显的缺点是它只适用于数字演示(网站,社交媒体,电子邮件等)。因此,我仍然会先进行渲染然后修改每个帧至高分辨率(5500像素宽),来为我以后的作品集提供选择。如果你不需要高分辨率的图像,而GIF在最后又会压缩很多,那么可以在一开始用较低分辨率去进行渲染从而节省大量的时间。下面是我如何创建GIF的过程截图。
As old school as they are, GIFs can still be a low tech, highly shareable solution to communicate an architectural idea. In this case, I was having trouble deciding how to illustrate the operable shade system of my research lab design. Enter the GIF. The obvious downside is that this solution only works for digital presentations (website, social media, email, etc). Therefore, I still rendered and Photoshopped each frame at a high resolution (5,500 pixels wide) to give me the option of using them in my portfolio later. If you don’t need high res images, GIFs are compressed so much at the end that it would save a lot of time to just render at the lower resolutions right at the start. Below is a quick breakdown of how I created the GIF.

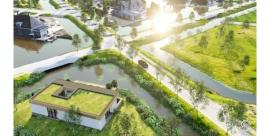
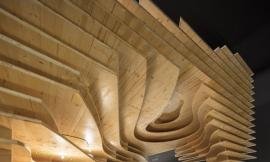
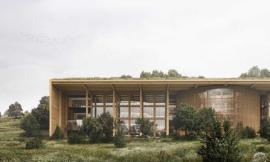
1. 对所有画面进行基础渲染
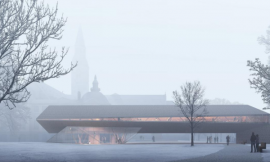
我设置我的SU模型在不同的位置显示阴影。然后我将每个阴影部位放在不同的图层上,并使用V-Ray渲染出各个图像。
1. Create Base Renderings of All Frames
I setup my 3D Sketchup model to show the shade structure at different positions of operation. I then placed each shade position on a different layer, and rendered each option out using V-Ray.

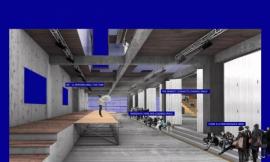
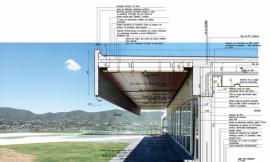
2. 对每个部位进行润色
上图显示了我在Photoshop中获得最终外观的一些重要操作。这些操作中的每一个步骤必须独立设置,这样我可以轻易地将它们从一个位置呈现到另一个位置。
2. Photoshop Each Position
The image above shows some of the main moves that I made in Photoshop to get the final look. Each one of these moves had to be setup in a way so that I could easily carry them over from one shade position rendering to the other.

这意味着图层设置尽可能仔细和干净。背景树对于所有图层保持相同,所以我把它放在图层的底部。在背景组之上,我分了1到5组代表每个阴影的位置。在每个编号的文件夹中,我放置了相应位置的基本渲染和其他与阴影位置变化的元素,如树影,反射等。然后我将最终效果,如霾和太阳眩光放入“效果” 组在顶部,因为这些保持不变,无论打开什么位置的阴影组。
This meant organizing the layers as carefully and cleanly as possible. The background trees remained the same for all frames, so I placed that at the bottom of the layer stack. Above the background group, I setup groups 1 through 5 representing each shade structure position. In each one of the numbered folders, I placed the base renderings of the corresponding position and other elements that changed with the shade positions such as tree shadows, reflections, etc. I then placed final effects like haze and sun glare into the “Effects” group at the top since these remain unchanged no matter what shade position group was turned on.


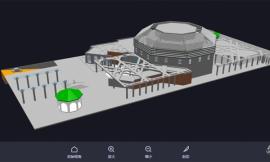
3. 启用时间轴
一旦图层设置好了,就是时候创建GIF。首先,打开时间轴,转到“窗口>时间轴”。这将在程序窗口底部显示时间轴界面。在时间轴界面中,选择下拉菜单中的“创建帧动画”。
3. Turn on the Timeline
Once the layers are setup, it’s time to create the GIF. First, turn on the Timeline by going to “Window>Timeline”. This should bring up the Timeline interface at the bottom of the program window. Also in the Timeline interface, choose “Create Frame Animation” in the drop down menu.

4. 创建时间轴的关键帧
假设图层设置合理,这部分会很快完成。添加新帧,只需关闭所需的图层,然后在时间轴调色板中选择“复制所选帧”。在每个帧下,您还可以通过在下拉菜单中选择时间长度来设置时间长度。
4. Create the Timeline Frames
Assuming the layers were setup properly, this part goes pretty fast. To add new frames, simply turn off and on the layers you want, then choose “Duplicate Selected Frames” in the Timeline palette. Under each frame, you can also set a length of time by selecting it in the drop down menu.


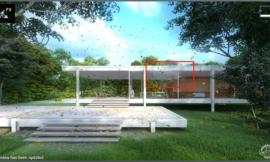
5. 导出GIF
一旦帧设置好了,就是时候导出看看效果了。 转到“文件>导出>保存为Web”。 在“保存为Web”对话框中,有很多选项会影响输出质量和文件大小。因为我的图像有很多细节和渐变,所以我想要保持更好的图像质量,这意味着文件会更大,因此文件打开和运行速度也会变慢。 A)对于预设,我选择了“GIF 128 Dithered”,它给我最好的色彩再现和最平滑的渐变。 B)为了减小文件大小,我将分辨率从5500px宽改变到1200px,这将我的文件大小降低到2.5 MB。 需要提醒一下的是,我想要我的GIF循环,所以我在“循环选项”对话框中选择“永远”。 最后,点击“保存”导出GIF。
5. Export the GIF
Once the frames are setup, its time to export. Go to “File>Export>Save for Web”. In the “Save for Web” dialogue box, there are quite a few options that influence the balance between quality and file size. Because my image has a lot of detail and gradients, I wanted to maintain better image quality which meant a larger and thus slower file to open and run . A) For the preset drop down, I chose “GIF 128 Dithered” which gives me the best color reproduction and smoothest gradients. B) To get the file size down, I changed the resolution from 5500px wide to 1200px which reduced my file size down to 2.5 MB. I should also note that I wanted my GIF to loop, so I chose “Forever” in the “Looping Options” dialogue box. Finally, I clicked “Save” to export the GIF.


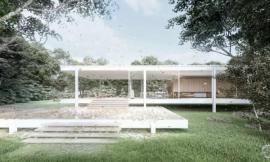
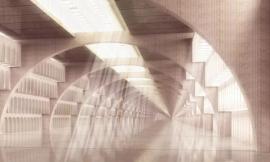
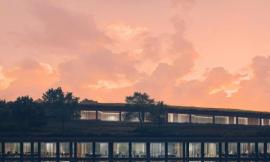
欣赏自己的作品吧!
The Final GIF
出处:本文译自visualizingarchitecture.com/,转载请注明出处。
|
|