由专筑网韩平,刘庆新编译
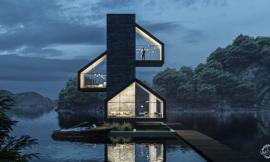
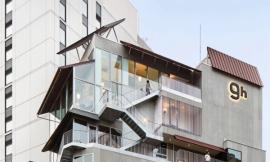
多美妙的冬景啊!论坛中分享的AESDE的“山地旅馆”效果图有着美丽的雪景,巧妙的构图和灯光,并因此评为2014年第21周“最佳效果图”。今天,他们将这个效果图的制作过程与我们分享。
Beautiful Chill! Great looking snow, composition and light are the characteristics of AESDE‘s ‘Mountain Hostel’ visual that was shared on the forums and awarded them Best Visualization of the Week NO. 21/2014. Today they share the process of making this great looking visual. Enjoy!

作者:Maciej Józefiak / AESDE
Maciej Józefiak既是一名建筑师,也是一名3D艺术家。他是波兰AESDE工作室的所有者及创办人,AESDE工作室是一所多元化的工作室,涉及建筑室内外的3D效果制作,平面设计和工业设计等。
项目论坛流程:Mountain Hostel
Author : Maciej Józefiak / AESDE
Maciej Józefiak is an Architect and 3D artist. The Owner and founder of AESDE studio in Poland – A Multidisciplinary studio involved in architecture exterior and interior 3D visualization, graphic and industrial design projects.
Project Forum Thread : Mountain Hostel
简介/Introduction
大家好!
首先,我非常感谢Ronen Bekerman邀请我,并给予我在这样著名博客的“制作”板块向大家展示我的“山地旅馆”项目的机会。
我先简单介绍一下这个项目••••••
由于我的拖延症(听起来很熟悉吧),这个项目被搁置了许多年,以致我都无法完成它了。这个项目是我个人概念化的项目,主要用于测试冬景和雪的材质。项目主要是通过自己的想象和参考冬天景色和雪景,在3D软件中设计创建。我希望简单的介绍下制作过程。
Hi all!
At first I would like to thank Ronen Bekerman for inviting me and giving me the possibility of presenting my project ‘Mountain Hostel’ in the Making-of section of this great blog.
I’ll start with a few words about the project itself…
This project was lying in my drawer for a few years because of chronic lack of time (sounds familiar?) and I just didn’t manage to finish it. The Mountain Hostel is a personal project I conceptualized due to my needs for testing winter scenery and snow materials. It was designed right inside the 3D program, fueled by my own imagination and references of winter and snow. I would like to present shortly the stages of making this visualization.
软件/Software
所有的场景都在3ds Max中创建,并用V-ray渲染,后期工作在PS中完成。
我们开始介绍••••••
The whole scene was made in 3ds Max, rendered with V-ray and post-worked in Photoshop.
Let me begin…
灵感/Inspiration
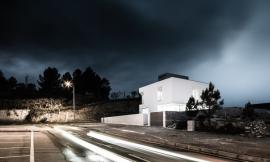
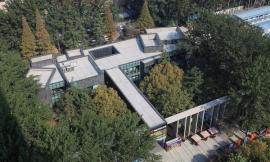
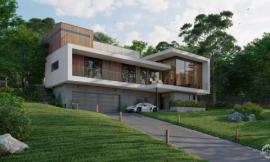
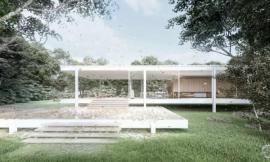
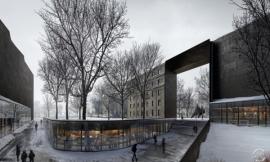
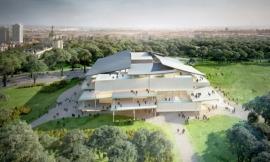
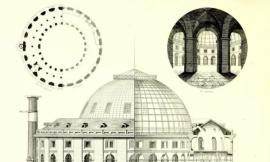
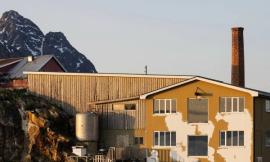
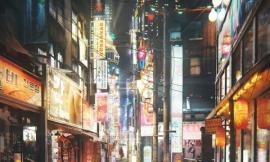
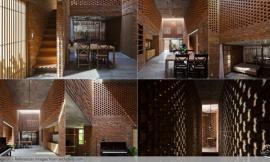
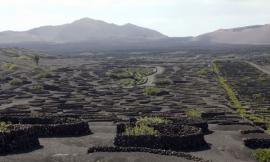
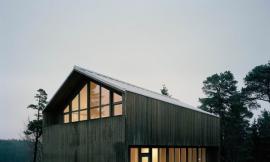
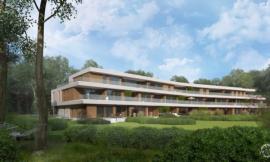
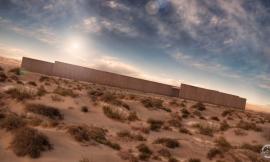
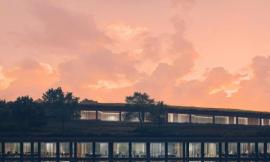
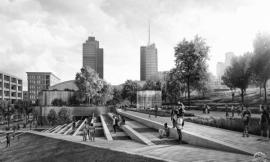
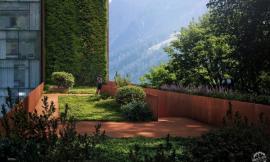
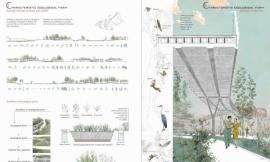
下面是我用来捕捉冬天和雪景气候的几张参考图片。
Here are some of the visuals I used as reference for capturing the atmosphere of winter and snow.

建模/Modeling
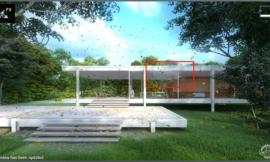
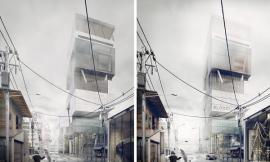
第一步,创建示意性的对象体块和建筑将被置入的场地。
Firstly, preparing demonstrative object box and the field where the building will be set.

接着,当我们场景建好后,我们可以设立照相机因为我们场景所需的所有元素(构图和灯光)都会更具这个特殊的角度而设立。
Next, as we have the scenery drawing, we can set the camera because all the elements of the scene (composition and lighting) will be set for the specific shot.

下一步,我们需要将建筑对象细化。
The next step is to make our object much more detailed.

一些模型细节场景••••••
A few more model detail shots…


现在我们将建筑移到场地中。我们使用细分功能增加匹配度,使用编辑多边形功能编辑建筑。我们使用绘图变形文件夹中的推/拉功能在我们需要设置雪景处设置雪的结构。因为我们使用了纹理位移功能,所以不需要建立雪的表皮——这个功能我们随后会介绍。
Now we are moving to the field. We are thickening the mesh using the subdivide function and edit it using editable poly. We are using the push/pull function from the paint deformation folder to create our snow structure where necessary. There is no need to model the surface of the snow more specifically because for this function we will use displacement texture – and we will describe it later.

再一步,我们加入之前准备的一线外部景物的纹理,比如柴火,指示牌,滑雪设施等等。
Next, we are adding previously prepared and textured elements of the outside scenery such as fire wood, information signs, ski equipment etc.

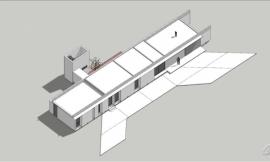
我们将所有元素组织起来。
We are composing all the elements.


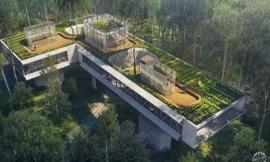
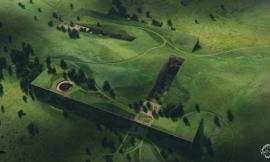
下面就是建好的场景。
This is how the ready scene is presented.

纹理和材质/Textures and Materials
以下是我们用到的重要材质和纹理:
Here are the most important materials and textures used :
雪/SNOW
为了使雪看起来更真实,我们使用了位移纹理。我将该纹理覆盖在需要的元素上比如滑板轨道等。它看起来更真实。
这就是我们完成的纹理的外貌:
To make the snow layer look more realistic, we are using the displacement texture. We are preparing the texture with all the elements needed such as scooter tracks etc. It gives us more realism.
This i show the ready texture looks like :

准备材质
Preparing the material.

这就是它最终的形态。当然,我需要确保使用位移功能操作所有的我期望变形的地方,所以我们在工作列表窗口中使用UVM贴图功能设置该纹理。
This is how it looks in the end. Of course we have to remember to make all the deformations from the displacement function in places we want to, so in the worksheet window we are setting the texture using the UVW Map function.

混凝土/CONCRETE
这是建筑外墙的材质。
The materials of the outsider walls of the building.

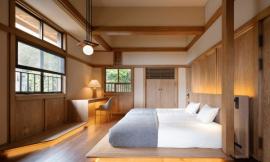
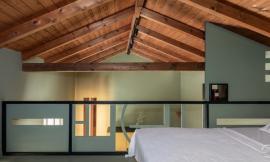
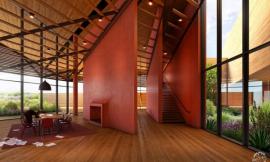
胶合板/PLYWOOD
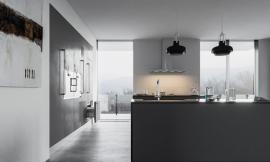
室内材质。
Finishing material of the interior.

灯光/Lighting
我们使用两个光源来照亮该场景:HDRI贴图中的V-Ray光源(圆形顶光源)和VRay太阳光。以下是控制阳光照度的参数。
VRay太阳光
To lighten the scene we are using two light sources : V-Ray Light (Dome) with the HDRI map and VRaySun. The parameters below are for the particular sources of light.
VRaySun

VRay光源(圆形顶光源)
VRayLight (Dome)

综合设置参数/General Settings

灯光检查/Lighting check

原始渲染/Raw render

后期制作/Post Production
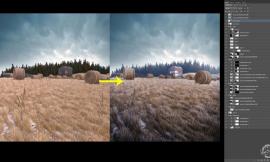
我们将在PS中将我们渲染的场景进行后期处理。接下来我们需要为场景准备合适的背景,该背景就是我们之前提到的可以捕捉到冬景气候的图片。
After rendering the scene we are moving to the post-production in Photoshop. Next we have to prepare the proper background for our scene which will capture the atmosphere of the picture as we assumed at the beginning.

我们将该图层加入背景中,使得背景与我们的场景更加匹配。同时我们也需要调整颜色和亮度。
We are applying the layers to make the background fit our scene elements. We are also correcting the color and brightness.


紧接着我们需要加如一些人使得场景看起来更生动。
Next we are adding some people to make the picture more alive.

我还增加了一些烟。我是用了“Ron的蒸汽和烟”PS笔刷进行操作。
We are adding some smoke. I am using “Ron’s Steam and Smoke” Photoshop Brushes.


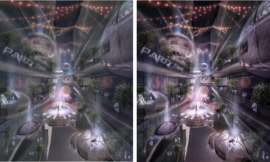
最后,进行细微的调整(颜色平衡度,对比度和亮度)
Finally, some little corrections (color, contrast and brightness).

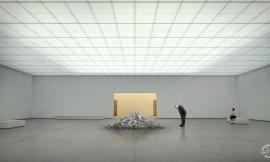
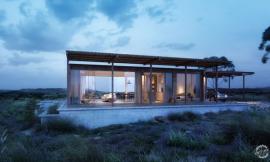
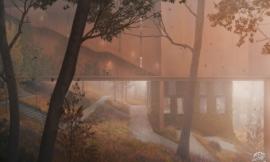
这就是调整该场景后的效果图展示:
This is how the visualization presents after framing the shot :

我希望你们能喜欢它,也希望大家能在这篇文章中找到感兴趣的或者自己喜欢的东西。希望这篇文章能有助于大家未来的项目。
最后,我想再次感谢Ronen Bekerman。希望大家踊跃评论,并在下面提出问题,我将一一解答。
谢谢大家。
Maciej Józefiak
I hope you enjoyed it and I hope that you found something interesting and useful in this article. Maybe it will be helpful in your own projects.
Once, again, I’d like to thank Ronen Bekerman, and please don’t hesitate to comment or ask questions in the comment section below…
Best regards,
Maciej Józefiak
出处:本文译自www.ronenbekerman.com/,转载请注明出处。
|
|
专于设计,筑就未来
无论您身在何方;无论您作品规模大小;无论您是否已在设计等相关领域小有名气;无论您是否已成功求学、步入职业设计师队伍;只要你有想法、有创意、有能力,专筑网都愿为您提供一个展示自己的舞台
投稿邮箱:submit@iarch.cn 如何向专筑投稿?