Making of Japanese Rain Showers
由专筑网严越,刘庆新编译
2016年第33周最佳图像奖获得者Joel Langeveld在A2工作室作为3d艺术家,将全程指导我们他闲暇时做出的超赞的“日本雨景”渲染效果。这个salmon可不是指那个三文鱼!
Best of Week 33/2016 Image winner, Joel Langeveld, takes us through the process of making his remarkable “Japanese Rainshowers” visual which he did on his spare time from doing yet more great work at A2Studio, where he works as a 3d artist. Nothing fishy about this salmon!
介绍
大家好,我是Joel Langeveld,我最近在荷兰的A2 工作室当3D艺术工作者,我会在我的作品集网站Nose of the Salmon (www.noseofthesalmon.com)分享一些我个人的作品。我也没有特别擅长这些软件,所以也做不出很华丽复杂的渲染效果,走比较艺术的风格路线,希望你们能喜欢。
灵感
夏天的时候有点空余可以做自己的东西,就想做些好看的东西,荷兰夏季的雨给了我很多灵感,做个人项目的时候我也想尝试些新技术。由于时间限制,只有一天两夜,这个项目要很快生成,不然又要归到那些落满灰尘的“有时间再去完成的伟大项目”文件夹里。
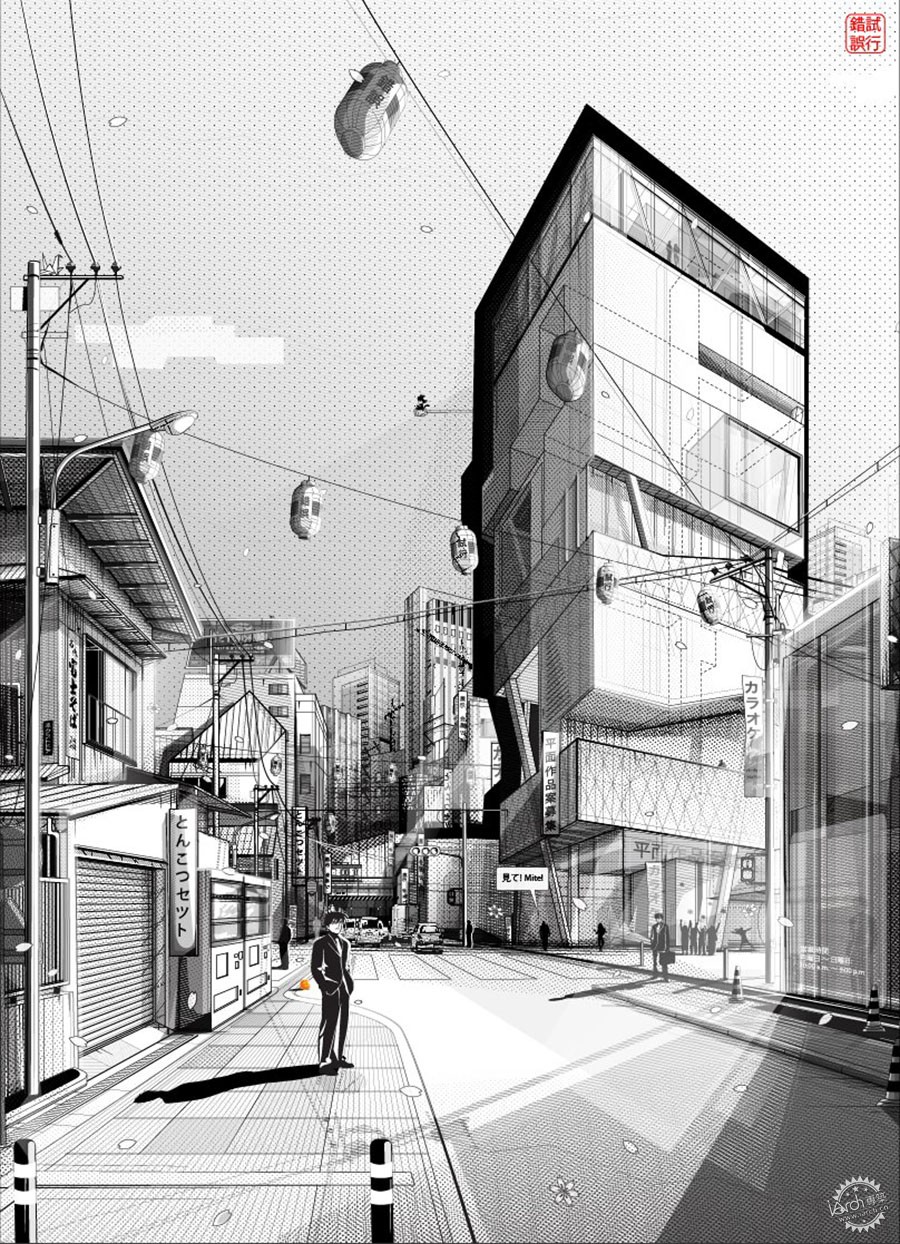
我先在网上找些好的例子,谷歌那些未建成项目尤其是学生项目,我看上了Alexander Daxböck的矢量图,建筑和构图都很和我胃口,我只加了些环境和纹理。
Introduction
Hi there, my name is Joel Langeveld. I am currently employed as a 3D artist at A2Studio in The Netherlands. Nose of the Salmon (www.noseofthesalmon.com) is the name of my portfolio website to share my personal stuff with the rest of the world. I am not that technical, so don’t expect fancy materials or complex render settings. I am leaning more towards the artistic side. I hope you will enjoy this read.
Inspiration
During the summer I found some spare time to do some new personal work. I felt like making something nice and the huge amount of rain during the Dutch summers also helped a bit.
Whenever I work on a personal project I also want to experiment with some new techniques. Because the time was limited (1 full day and 2 evenings) it should be a straightforward process. If not, it would have ended up on the dusty pile of the unfinished-but‐could‐be‐great‐if‐I-have‐the‐time projects like we all have our hard drive.
I started looking on the internet for some nice references. While googling for unbuilt architecture (for example student projects) I stumbled upon a really nice vector drawing of Alexander Daxböck. Since the architecture and the composition was too my taste I could focus on the atmosphere and the texturing.
可能受阿姆斯特丹雨季的影响,我想打造雨刚刚停的氛围。
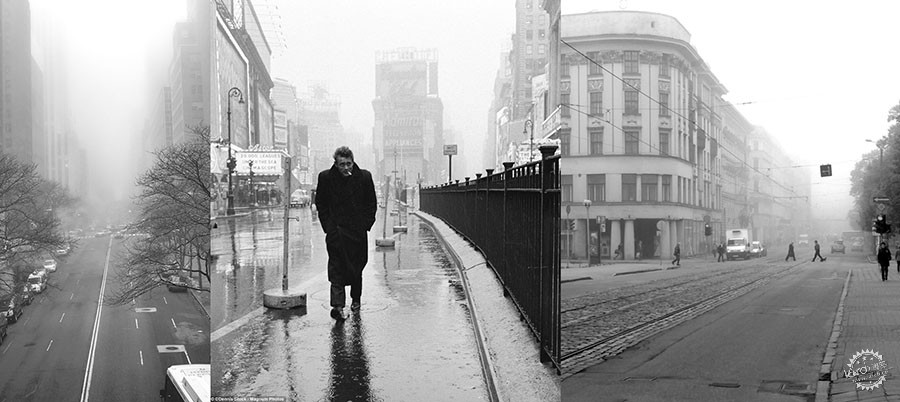
我喜欢雾蒙蒙的富有诗意的图像。有很多James Dean在雨中漫步在时代广场的照片都很有名,我想做出那样的效果。
In terms of atmosphere, I went for the it‐just‐stopped‐raining mood, probably influenced by the rainy weather conditions over here in Amsterdam.
The fact I really love these foggy atmospheres also helps a little. Fog makes images more poetic. There is this famous image of James Dean walking in the rain on Times Square. This is the mood I would like to achieve.
虽然这个技巧已经很普遍,但是我还没有试过。我可以尝试下水洼,裂痕,打滑印迹和灰尘。
我用32k像素的公路和一些你们不会在渲染里看到的一些素材。
另外我不想像以往一样用ps出图,这次我想试试别的方式。
Although it is a fairly common technique I wanted to do some tests with painting the texture for the road. I never did it before. This situation gives me the opportunity to do some nice texture painting with puddles, skid marks, cracks, signage, and dirt.
I ended up with a 32k pixel road texture and had some fun painting stuff you can’t even see in the render.
Another goal was to a lot in 3D. Often I rely on my Photoshop skills to finish an image. This time, I want to try to do it the other way around.

3d建模
好,当我刚刚没说,我很快就对建模失去兴趣了,ps拯救世界,但是这次还是以3d为主。我先从图像左边入手,大约估计一下矢量图的尺寸,基本的多边形建模,没什么特别的,主要还是靠textures.com上的好素材。
我用中国风的灯光效果来让环境更显得是在亚洲,随机放置它们的位置来制造一种风吹过东京街边的感觉。
这个教程是充分利用草图大师,虽然模型库大部分都是垃圾,建筑设计师都能做得更好,但是仔细找还是有好东西的。
交通信号灯,地下铁是直接从模型库找的,你不会觉得我会做所有的建模吧?
电线杆和图签中红色区域也是素材库里找的,其他是我建模的。
3d Modeling
Although I start with a lot of ambition, most of the time I am getting bored modeling quite fast. Hence the fact I solve a lot in PS.
But, like I said, this time, everything should be 3D.
First I started with the left side of the image. I had to guess the measurements from the vector drawing. It is really basic polygon modeling. Nothing special over here. What makes these buildings nice are the realistic textures from textures.com.
I added some Chinese lamps on the awning to enhance the Asian feeling. By placing them randomly (and not vertical) I tried to get the feeling wind blowing through the Tokyo streets.
The tip of the day is to use the SketchUp warehouse models to your advantage. I know, 90% of the warehouse is garbage, even architects make better SketchUp models. But, at the back of the top shelf, behind that box full of 6 polygon cars, on top of the shelf with the trees mapped on a plane, there are some real gems inside that warehouse.
The traffic signs are straight from the warehouse. As is the street cafe. The elevated metro in the background… straight outta SketchUp. And you don’t think I would model all these background buildings, right?
Of course, the electricity poles with the wires on the foreground are hand modeled… sike! also Sketchup.
The red stuff in the image is Sketchup, everything else is modeled by myself.
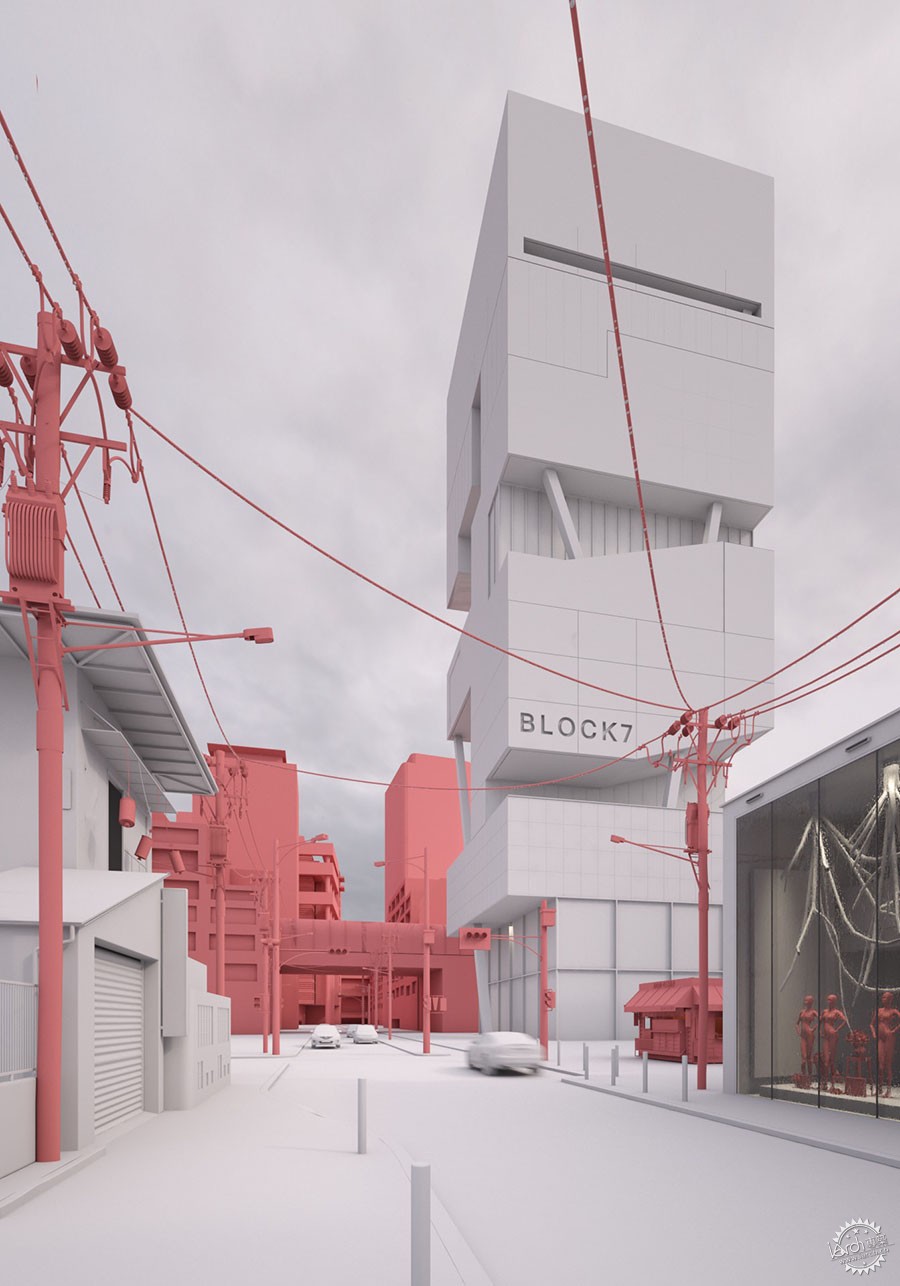

公路就是一个平面,细节都是材质画上去的,人行道是不同材质做的物体。
我在线上加了些水珠,看上去不错也有了细节。电线是渲染的,用小球体表现雨滴。
用间隔工具让雨滴沿样条均匀分散开,为了让效果更随意,我随机删了70%的雨滴。剩下的随机处理后,能改变大小形状。
The road is just a plane. All the details are within the texture I painted. The sidewalk consists of different (simple) objects treated with different textures.
I have added some water drops on the wires. I thought it would look cool and add some detail. The wires were remodeled with a renderable spline. I made one small sphere to represent a raindrop.
Now I was able to use the spacing tool to evenly spread the raindrops along the spline. To make it more random, I random selected 70% of the raindrops and deleted them. The leftovers were treated with an object randomizer, so they will differ in size and shapes.

纹理及材质
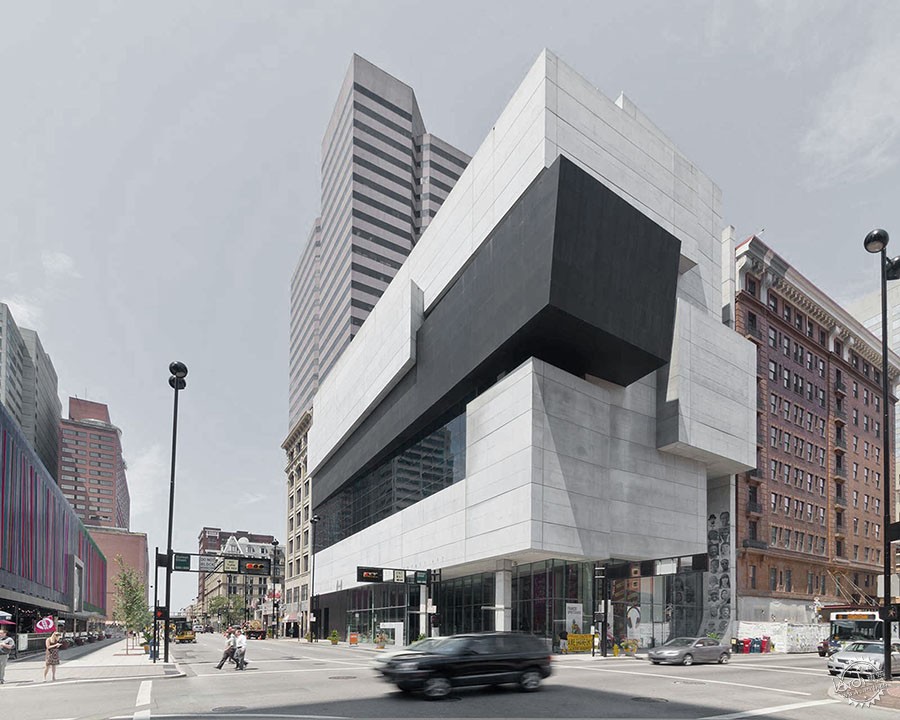
矢量图基本没有什么使用材料的信息,所以只能靠直觉。我蛮喜欢扎哈的辛辛那提美术馆设计的那样黑白的混凝土,在我设定的天气里会显得比较有男子气概,挺酷的。
Texture & Materials
The vector drawing barely had any information on the type of materials used. Deciding the materials was a purely intuitive process. I always had a soft spot for the Cincinnati art museum by Zaha Hadid. I love the black and white concrete. So I figured it could be cool on this building. It makes the building manly and stands strong in this kind of weather conditions.
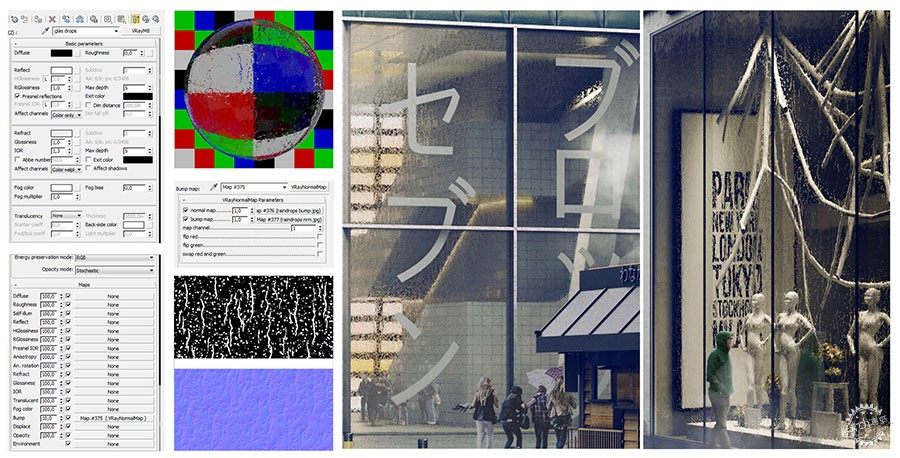
纹理还是很基础的那些,为了达到下雨的效果,加了比较强的反射。至于窗上的雨滴,在凹凸纹理里加了黑色和白色的纹理。我的构想是散落的雨,在giancr.com 看了看,不确定能不能达到那样的效果,但是我试了一下,觉得做的挺好的,还挺快。
Texturing was fairly basic. Since it rained I added sharper reflection on the materials and more than normally would have been the case. For the raindrops on the window, I used a black and white texture inside the bump slot. At first, I wanted to scatter raindrops on the windows. But then I stumbled upon this method on the web on giancr.com. I doubted it would work, but at the first test, I already noticed that this will work out fine and fast.
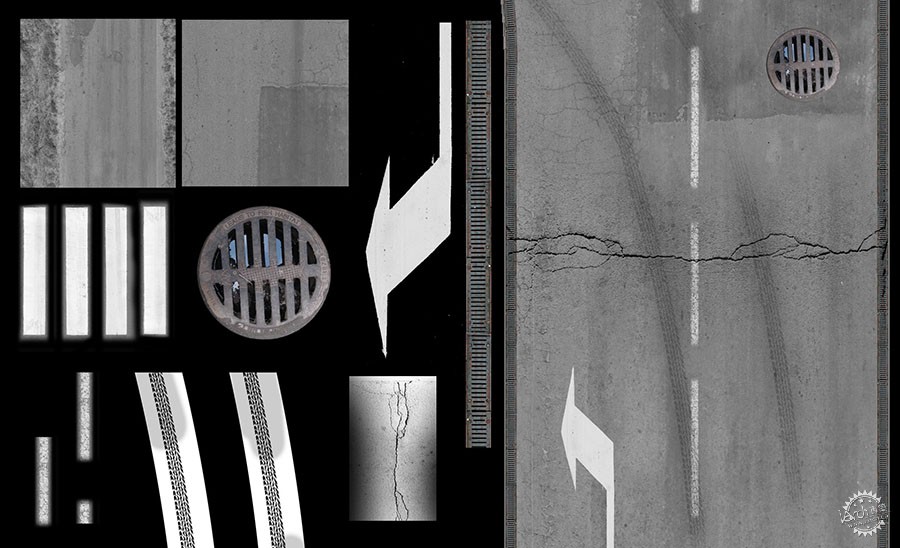
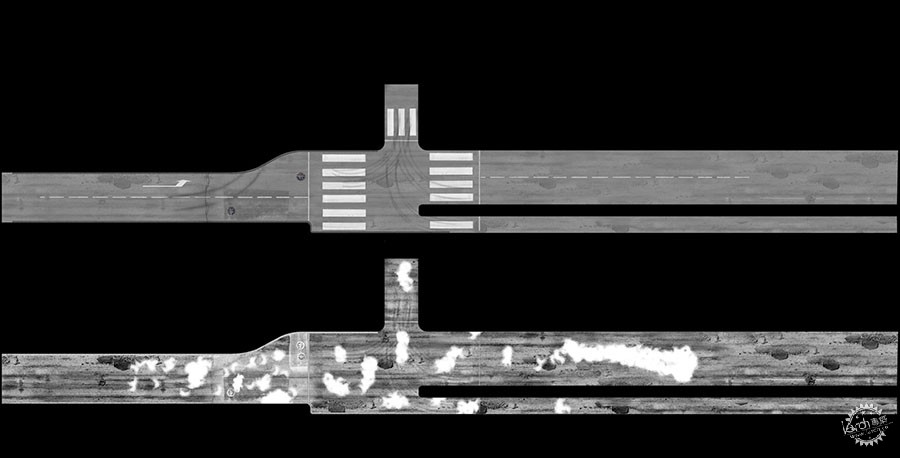
要给一整张地图加纹理还是第一次,我描了道路轮廓(抠图),渲染下放进ps。
先要测试纹理要多大,我平铺了些普通沥青纹理,用4500px,多试几次,知道要用32k像素大小的最清楚。(电脑渲染得太慢我能怎么办,我也很绝望啊)
然后处理右边,虽然不是重点,但是画道路细节还是蛮好玩的,防滑标志,箭头和道路标识(日本字没处理好)下水道和裂缝用不同种的沥青纹理。
虽然后期的制作让这些细节都不怎么明显了,但是还是很有用的,你可以更清楚内容像素大小和细节。
Another new thing for me was texturing the road with one big map. I modeled the outline for the road, rendered the unwrapped mapping and brought it into Photoshop.
The first thing to do is to test how big this texture should be. So I tiled some regular asphalt texture and rendered the image at 4500px (height). After some tests I came to the conclusion the Photoshop file should be 32k pixels, to get this road texture sharp enough in a render. (Which was quite a pain in the ass for my slow ass laptop).
Now I could start painting on the right resolution. Although it was not quite necessary for this scene, I had fun painting all the details on the road. The skid marks to the garage and on the crossing, the gutter alongside the road, the arrows and road signs (too bad I didn’t paint nice road signs with Japanese characters), the sewers, the cracks, the different types of asphalt.
The post‐production made a lot of these details vanish, but I can really see the benefit of doing it like this all the time. You have way more control over the quality and level of detail of the road.
灯光
为了达到雨刚停的效果,天空要是多云的亮度。最后我选了Peter Guthrie做的1044 overcast HDRi效果。
HDRi的太阳能做出较柔和的阴影,就像雨刚停,天空刚放晴可以收伞的时候,把光泽度改成0.9来增强效果。
Lighting
To achieve this just‐after‐rain mood I needed a nice cloudy sky to light up the scene. Eventually, I went for the 1044 overcast HDRi from Peter Guthrie.
The HDRi has a medium-bright sun in it. This sun generates some nice soft shadows. It gives the idea that the rain just stopped and the sky opens up and the umbrellas can be closed again. I reduced the gamma to 0.9 to boost the contrast of the HDRi, and thus the amount of light and shadows.
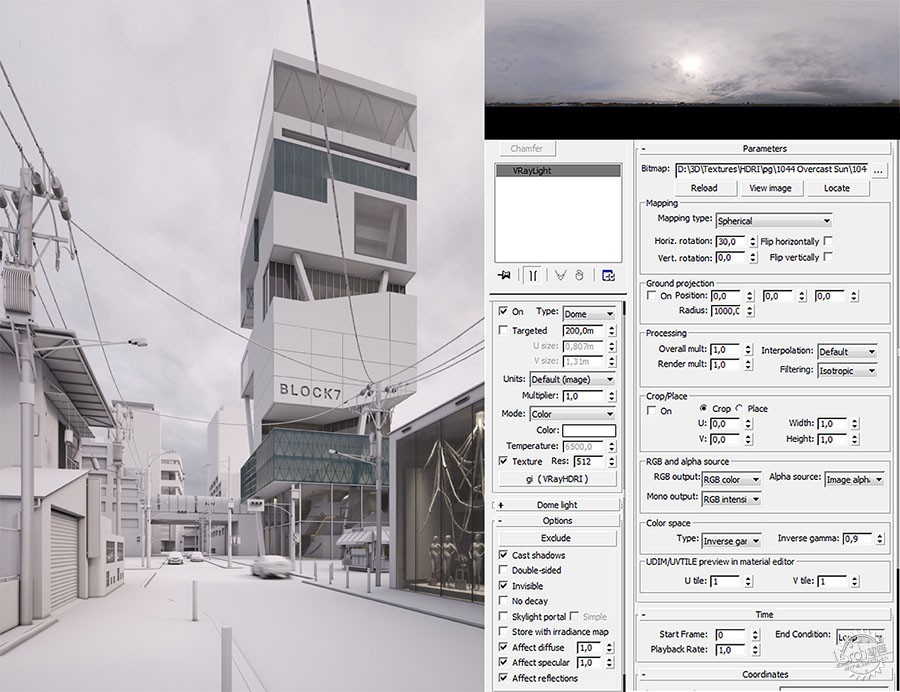
室内灯光效果都是vray做的,定向在0.78,这样,vraydengguang像锥形的聚光灯。
All the interior lights are done with a simple V-Ray light. I have set the interior lights to disc type and put the directional to 0.78. In this case, the VRayLights will behave like a cone shaped spotlights.
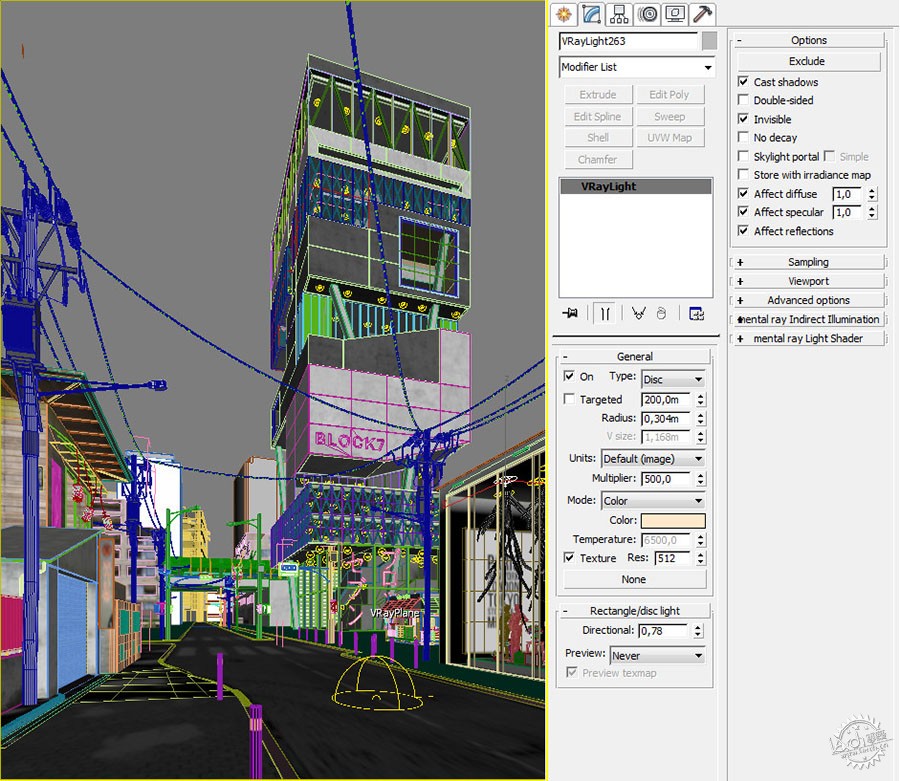
渲染
没什么多说的,就用的LC-IM组合。
后期制作(其实是 主要过程)
要把图像做得更生动,就要加入故事性来吸引人,这部分是最后一部分。但是我等不及想看看渲染出来的东西能不能在ps里显得好看,所以ps这部分我乐在其中。
Rendering
Not interesting at all
I have used the good old LC‐IM combo.
Post Production (read as Main Production)
Now it is time to bring this piece to life. Get some story in it and make it attractive.
The way this tutorial is set up it may seem like the post‐production part is the final part of making an image, as the naming also suggests. But I like to fire up Photoshop as soon as I can. So after the first crappy renders, I already start playing around in PS to see if it is all worth it. I would even say that the majority of the Photoshopping is already done before tweaking the materials and the modeling. So the term post‐production is not really applicable in my workflow ;‐)
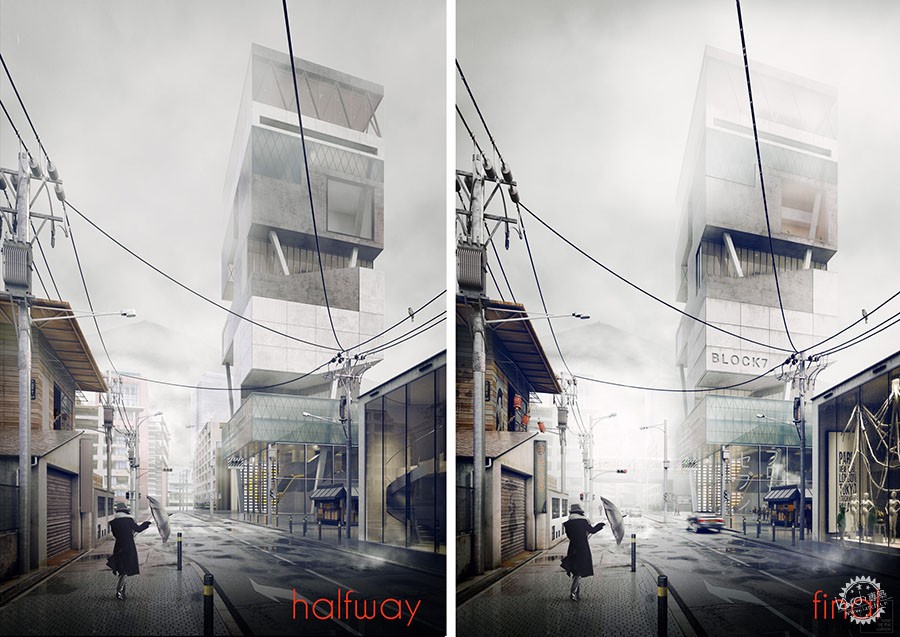
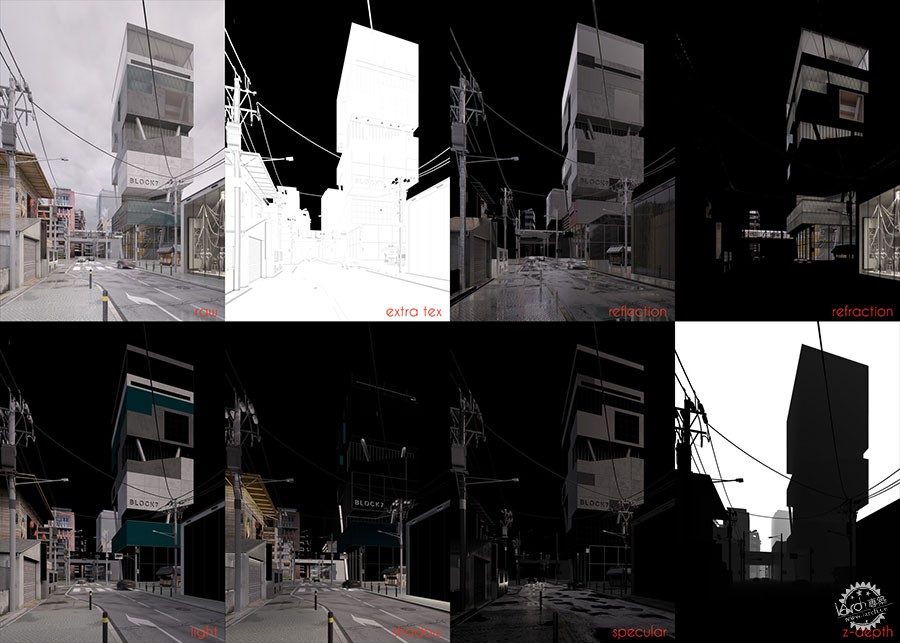
在遮罩模式后尝试了八种蒙板,在全屏模式或者线性减淡模式来提高表现力。
The first thing I do in PS is start playing with the elements. Basically, I use 8 elements, next to the masking elements (see image below). I use them in screen mode or in linear dodge mode to enhance some parts of the scene.
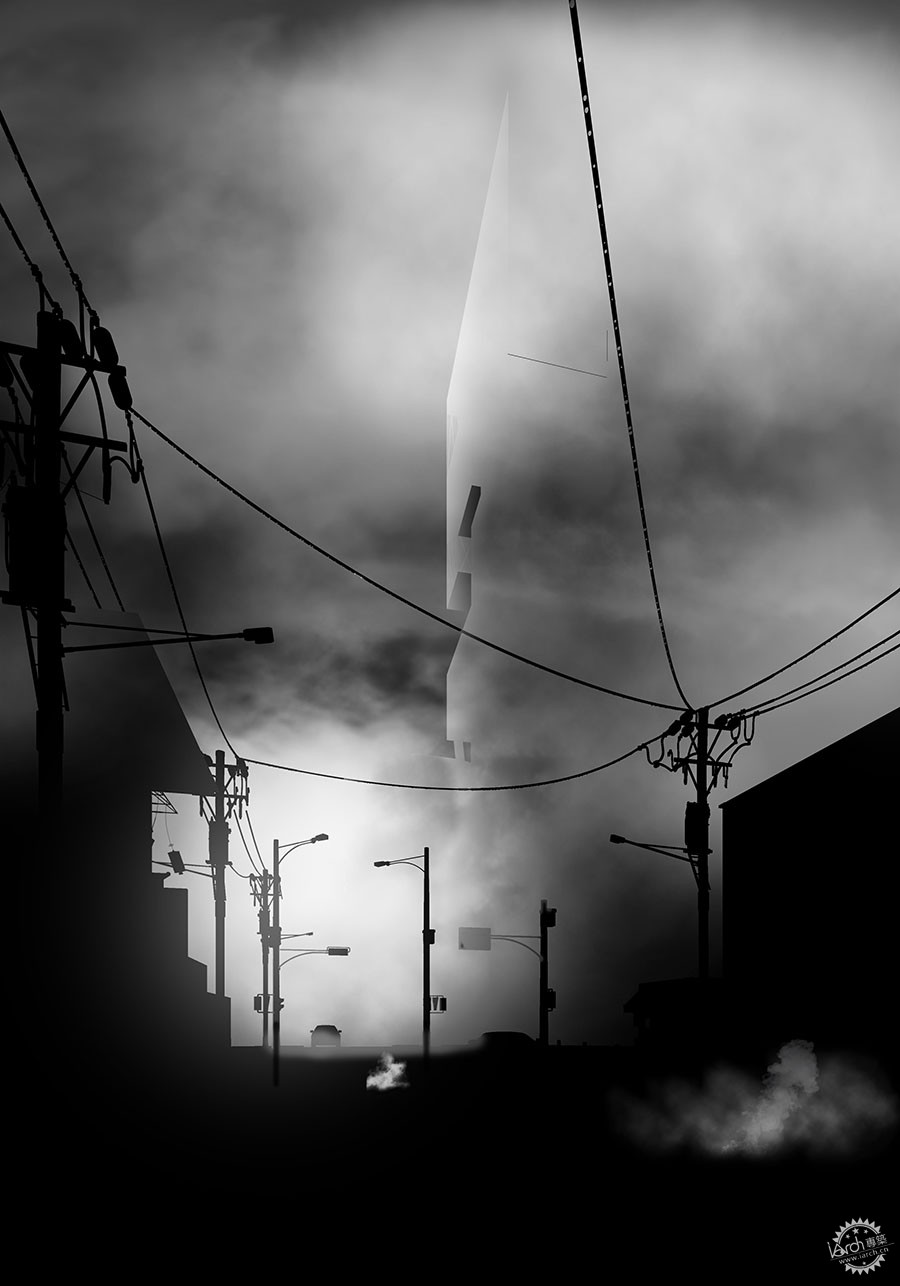
我把对比度调和,色彩平衡调低。正如你所看到的,场景有浓雾的效果。基础渲染是用 Z‐深元素建立(用屏幕模式和一个水平调整图层),然后,我在顶层涂上浓雾,我只使用标准刷和一个能在网上找到的简单的云彩笔刷,但要确保雾前方被遮罩的物体的景深。
After I put the elements on top of the raw render I do some rough Contrast and Color Balance. As you can see there is a lot of fog in the scene. The base is setup with the Z‐depth element (in screen mode and a level adjustment layer), after that, I painted a shitload of fog on top. I just used the standard brush and a simple cloud brush as one can find on the internet. Just make sure you keep the depth in the scene by masking out the objects in front of the fog.
渐晕是很重要的一部分,我会用很重的渐晕效果,让看图片的人真的感觉进入到图像里。
正如一开始所说, James Dean的图片是很好的参考,不仅仅是那时的情绪,更是肢体语言和面部表情。在我的图片里拿雨伞的女孩也是这个用处,叫她Marilyn吧,她吸引注意力。雨伞的用意就是表现雨刚刚停的时刻,Marilyn着装正式,正准备前往Block 7,作为向James Dean的致意,我也放入了他的图。
我为后期的过程做了分解步骤的视频。
The vignetting is also an important part to me. I like a heavy vignetting so that the spectator will get drawn into the image.
As I told in the beginning, the famous James Dean image was an important reference. Not only the mood but also his body language, his facial expression are key. So my James Dean is the girl with the umbrella, let’s name her Marilyn. The position of the umbrella was perfect for my it‐just‐stoppedraining mood. She draws a lot of attention and composition‐wise she is a great counterpart for the building. Marilyn is also quite classy dressed and apparently heading for Block 7. As an ode to the James Dean image, I also put him in the image.
To complete this part, I made a breakdown video of the post production
出处:本文译自www.ronenbekerman.com/,转载请注明出处。
|
|
