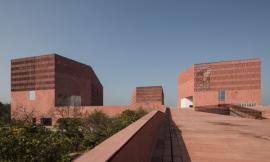
Lab Section Studies
由专筑网韩平,刘庆新编译
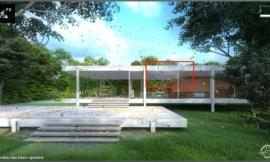
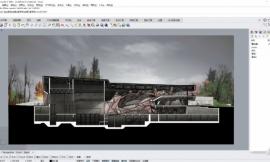
我一直注重提高我的研究实验室理念,具体来说,我一直注重一些设计的剖面品质。由于这些天时间紧迫,我没有总是建立每一个想法的详细模型。在这个案例中,我在我的主模型上切出一个切面,然后在Photoshop中操作,以此尝试一些想法。对于带有清晰轮廓和阴影的图这个方法是没有必要的,但是得到大致想法这足够了,同时,还展示了我的一些工作流程。
这种风格的图是在我的“文化中心介绍说明”基础上构建的,体现风格的部分很少。景观元素再一次抽象,明暗对比简单。颜色也被概括成广泛的具有代表性玻璃、植被、室内等基本元素。你可以从类似这种风格的元素中得到更多。一个完整的细节模型并不是必需的,错误可以通过涂抹和填充来隐藏起来。
I have been continuing to develop my research lab concept and specifically I have been focusing on some sectional qualities of the design. Since time is limited these days, I don’t always build elaborate models of each idea. In this case, I cut a section through my master model and worked it over in Photoshop to test out some ideas. This method doesn’t necessarily always yield the cleanest images in terms of sharp line work and shading, but it is more than enough to get the idea across and show some of my process work at the same time.
This style of illustration is building off of my “Culture Center Intro Illustration” which took on a minimal/vintage type look. Again, landscape elements are abstracted and shading is simplified. Colors are also diagrammatic to broadly represent basic elements of glass, vegetation, interior, etc. You can get away with a lot more going with a style like this. A fully detailed model isn’t necessary and mistakes can be concealed through paint and poche.
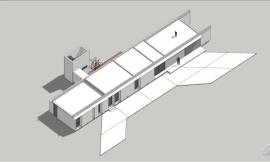
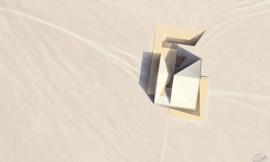
1. Sketchup模型/Sketchup Model
如我所说,我不想花时间对每一个想法建模。因此,我仅使用一个模型,然后在Photoshop中复制了三次。
Like I said, I didn’t want to spend the time modeling each idea. Therefore, I used just one model, then copied it 3 times in Photoshop.
2. V-Ray渲染/V-Ray Rendering
我在V-Ray中使用材质覆盖来产生一个简单的白模渲染,在这个网站中是标准格式。
I used the material override in V-Ray to generate a simple clay model rendering, standard stuff here on this website.
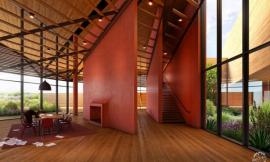
3. 填充/Poche
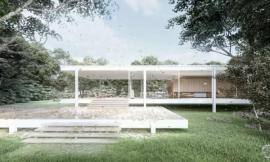
我在Photoshop中做的第一件事就是填充,或者用黑色填涂填满模型的切掉部分。这样使切面的可读部分清晰呈现,还隐藏了模型的错误。我也在Photoshop中编辑基础渲染来测试出其它切面的想法。在这个案例中,我塑造出支撑圆柱的地面和其它的小变化。
The first thing that I did in Photoshop was poche or fill in the cut areas of the model with black paint. This helps clarify the reading of the section and hides mistakes in the model. I also edited the base rendering in Photoshop to test out some of the other sectional ideas that I had. In this case, I sculpted the ground around the support columns as well as some other minor changes.
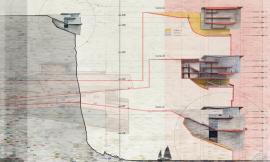
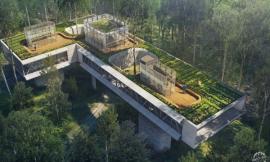
4. 突显景观/Landscape Highlight
这个剖面图意在展示切面的两个层的信息。黑色填充代表结构切面,红色代表植被。从这三种调查能看出来植被是怎样穿梭在建筑之间的。稍后我可能会在路边创建这些想法的注解。
The section diagrams are meant to show two levels of information in the cut. The black poche represents the cut through structure and red represents vegetation. These three studies are looking at how the vegetation flows in and around the architecture. I will probably create a key or annotate these ideas later on down the road.
5.颜色/Color
这时,使用颜色帮助定义材质和进一步明晰图表的可读性。我并不太在意颜色是怎么读出来的。我只需要获得图层的设置,知道稍后我可能会做一些改变。我也知道我最后将会用滤镜全面调整颜色。
At this point, color is introduced to help define material and further clarify the reading of the diagram. I am not too concerned with how the colors are reading. I just need to get the layers setup knowing that I most likely will tweak them later. I Also know that I will make sweeping color adjustments towards the end with topaz.
6. 背景/Background
渲染图插入了一个简单的背景——抽象的树融入到长长的线性元素中。我用树枝避免背景过于复杂,也避免从剖面转移注意力。
A simple background was inserted which abstracts the trees into long linear elements. I wanted to avoid the background getting too busy with branches and distracting from the section.
7. 滤镜和纹理/Topaz and Texture
最后我用滤镜调整了色调,并涂上了一些纹理。因为太多编辑操作是在Photoshop中完成的,纹理帮助隐藏了一些缺点,将许多不同元素结合在一起。上图,我用素描纹理,将其垂直延伸,又用Photoshop过滤器生成噪音纹理。
Finally, I adjusted the tones using Topaz and overlaid some textures. Since so many edits were made in Photoshop, the textures help hide some of the imperfections and tie a lot of the different elements together. Above, I used a sketch texture that I stretched vertically and a noise texture generated by a Photoshop filter.
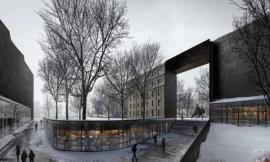
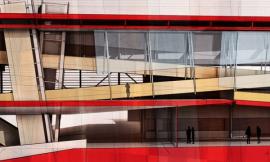
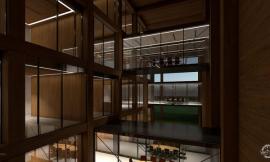
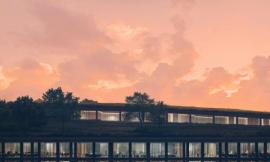
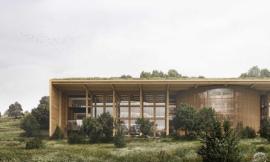
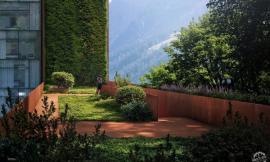
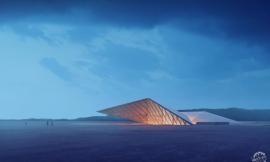
最终效果图/The Final Images
出处:本文译自visualizingarchitecture.com/,转载请注明出处。
|
|
专于设计,筑就未来
无论您身在何方;无论您作品规模大小;无论您是否已在设计等相关领域小有名气;无论您是否已成功求学、步入职业设计师队伍;只要你有想法、有创意、有能力,专筑网都愿为您提供一个展示自己的舞台
投稿邮箱:submit@iarch.cn 如何向专筑投稿?